The Art of Blending Ceramics: Creating Natural, Harmonious Smiles
“It’s not always about symmetry or textbook perfection.”
James Klim DDS
One of the greatest challenges in restorative dentistry is getting a ceramic restoration to blend seamlessly into the natural dentition. Whether you're working on a single anterior tooth or a full arch case, achieving a natural match requires more than just picking the right shade tab—it demands a deep understanding of optical properties, prep design, and material behavior. In this post, I’ll walk you through the principles I use in my clinical and digital workflows to create restorations that not only look natural but feel invisible in the smile.
Blending Ceramics Is the Art of Distraction
Here’s the truth: perfection doesn’t exist in nature. Teeth aren’t symmetrical, nor are their shades consistent from tooth to tooth. This natural variation gives us permission to focus on the art of distraction, rather than trying to force artificial perfection.
When a ceramic blends seamlessly, it’s not because it’s perfect—it’s because it avoids visual tension. If a restoration doesn't catch your eye in the first 2–3 seconds, that's success.
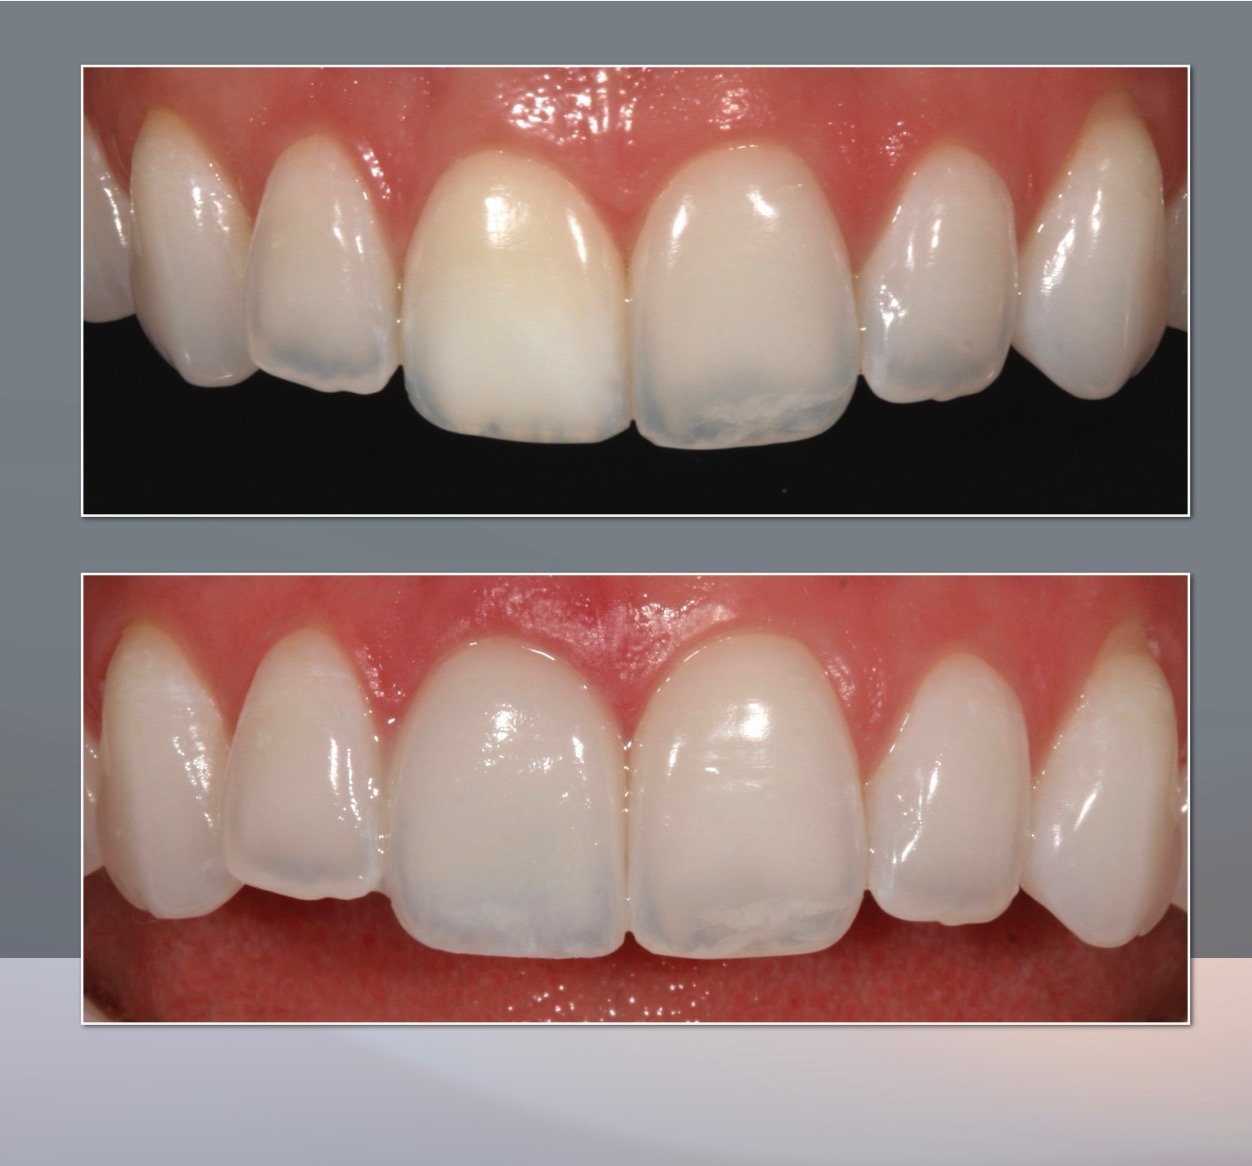
Rule #1: Match the Value, Not the Color
When selecting ceramics, the instinct is often to look at hue or shade. But the most critical element is value—the lightness or darkness of the material.
Why? Because if the value is too low, especially when you're restoring a single tooth, it immediately draws attention. Focus on matching the value, especially from the incisal to cuspal one-third. Get this right, and you're 80% of the way to a natural-looking result.
Case Study: Which Restoration Would You Choose?
In one of my most popular presentations, I share a case where we milled out four different ceramic options for teeth 7–10:

Try-in Variolink Esthetic Neutral Try-in Paste
All of them could work. But the winning choice? B1 Multi. Why? Because its LT cervical base effectively blocked out darker root structures, gradually transitioning to translucency at the incisal. It provided both the masking and the natural gradient we needed.
Design Is Personal: Let the Patient Guide You
Here’s an insight I didn’t expect from that case: when a lab tech commented that the incisal edges looked too rounded, I asked the patient why she chose that look. Her answer? “That’s how my teeth looked at my high school prom.”
She wanted to recapture a version of herself. So we shaped the restorations accordingly.
Blending ceramics isn’t just about aesthetics—it’s often about healing.
Core Principles of Ceramic Blending
Let’s break down the five key principles that guide our ceramic blending decisions:
1. Thickness
Ceramic thickness affects both shade and translucency. You often can’t choose the final ceramic until you know your minimal and maximal thicknesses. That’s why digital tools like PrimeScan and design software are critical—they allow us to measure down to the micron and match materials appropriately.
2. Translucency
Using e.max as our example:
LT (Low Translucency) blocks out dark underlying shades.
MT (Medium Translucency) offers a balance.
HT (High Translucency) gives beautiful optical effects but requires a light prep.
In ideal cases—light preps, enamel margins—I’ll often choose HT and let the natural tooth structure and prep shine through.
3. Target Shade
I rarely choose the exact shade name on the tab (e.g., B1 for a B1 target). In fact, for thin anterior veneers, I’ll often select a BL2 HT to arrive at a B1 effect. It's all about understanding how materials behave optically.
4. Prep Color
Understanding the underlying stump shade is essential—especially in discolored or complex cases like tetracycline staining. One method I use is creating custom shade guides by milling various ceramic samples over prep-colored mockups. This allows me to simulate final outcomes with accuracy.
5. Cement Color
Your luting cement plays a critical role in the final result. I use Variolink Esthetic, available in both light-cure and dual-cure. When doing a single anterior unit, I typically select a cement shade one step brighter than I think I’ll need. This compensates for slight value drops post-cure and helps ensure a better final blend.
Final Thoughts: The Blend, Not the Match
Ceramic artistry is about more than matching—it’s about creating harmony. When the restoration blends with the surrounding dentition in value, translucency, and shape, it disappears.
And remember: it’s not always about symmetry or textbook perfection. It’s about the emotional impact of a smile, the story behind each tooth, and the healing that comes with restoring confidence.
To view on demand training videos on this subject and more, become a Premium Member. See full membership information here